Review Tại sao cần private registry
Thủ Thuật Hướng dẫn Tại sao cần private registry 2022
Dương Anh Tuấn đang tìm kiếm từ khóa Tại sao cần private registry được Update vào lúc : 2022-11-03 05:54:02 . Với phương châm chia sẻ Thủ Thuật về trong nội dung bài viết một cách Chi Tiết 2022. Nếu sau khi đọc nội dung bài viết vẫn ko hiểu thì hoàn toàn có thể lại Comments ở cuối bài để Mình lý giải và hướng dẫn lại nha.# Lời tựa
Chào những bạn, tiếp tục với series dựng lab kubernetes thì việc triển khai ứng dụng trên K8S sẽ nhất thiết phải sử dụng tới **Docker Registry** để tàng trữ Docker Image cho dự án công trình bất Động sản.
Tùy vào đặc thù từng cty mà sử dụng những giải pháp rất khác nhau. Đối với khối mạng lưới hệ thống trên cloud thì hoàn toàn có thể sử dụng những dịch vụ Docker Registry sẵn có của những Cloud Vendor. Nhưng với Onpremis thì sẽ phải tự xây dựng riêng.
Mình thấy có nhiều giải pháp Docker Registry như dùng Gitlab Registry (đi kèm
với bộ Gitlab khá tiện lợi), Private Docker Registry, Harbor Registry..
Trong nội dung bài viết này mình sẽ hướng dẫn những bạn dựng Docker Registry dùng **Private Docker Registry** và **Harbor Registry** setup trên Centos. Tùy theo nhu yếu của những bạn thấy cái nào phù hợp hơn thì hoàn toàn có thể tham khảo và sử dụng.
***Note: Mình để dành phần 9 để hướng dẫn setup một số trong những phần mềm open-source phổ biển và phần 10 là setup logging cho K8S. Tuy nhiên ngày hôm nay tiện cài registry nên viết bài này trước
:”>***
# Giới thiệu
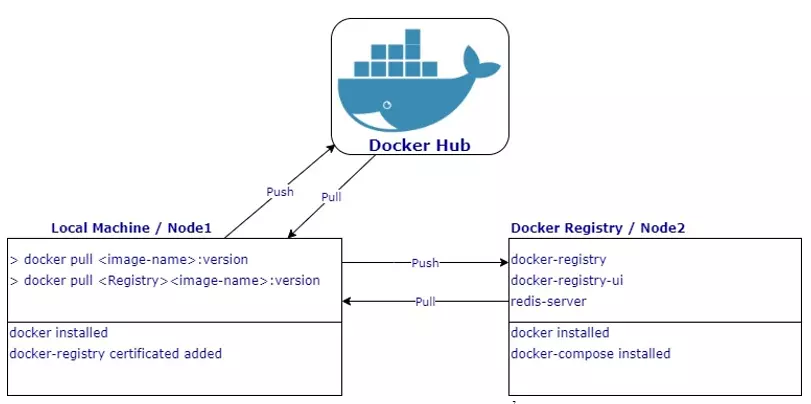
Thông thường khi bạn có máy client đã cài docker, thì hoàn toàn có thể thực hiện những thao tác trên đó với docker như docker pull để tải về docker image. Khi thực hiện câu lệnh:
docker pull :version
Khi đó docker client sẽ thực hiện link tới docker hub mặc định để tìm kiếm và pull docker image đó về máy client. Docker Hub là một kênh dịch vụ của Docker cho việc tìm kiếm và chia sẻ những Docker Image dành riêng cho mọi người.
Tuy nhiên khi bạn triển khai một dự án công trình bất Động sản và yêu
cầu phải có Docker Registry cho riêng mình, hoặc do điều kiện không được cho phép có link ra ngoài Internet để tải về từ Docker Hub. Lúc đó bạn sẽ nghĩ đến việc cần xây dựng một Docker Registry riêng. Private Docker Registry sẽ giúp bạn quản lý những Docker Image và chia sẻ với mọi người trong team. Nó cũng giúp việc chia sẻ/tải về những Docker Image chỉ dùng link nội bộ mà không yêu cầu phải có link internet.
Việc này cũng giúp giảm thời gian triển khai do băng thông của mạng nội bộ có
thể to hơn rất nhiều băng thông Internet. Cũng như việc những công ty sẽ không lưu Image lên những nền tảng public mà sẽ phải có hệ thông quản lý riêng.
***tin tức lab mình đang xây dựng:***
– 03 Master Node: viettq-master1 (192.168.10.11), viettq-master2 (192.168.10.12), viettq-master3 (192.168.10.13)
– 03 Worker Node: viettq-workter1 (192.168.10.14), viettq-workter2 (192.168.10.15),
viettq-workter3 (192.168.10.16)
– 01 Rancher Node: viettq-rancher (192.168.10.19)
– 01 CICD Node: viettq-cdcd (192.168.10.20)
***Do mục tiêu sẽ dựng lab Kubernetes + CICD nên mình dựng Registry trên node CICD, để tiện sử dụng sau này.***
# Hướng dẫn cài Harbor Registry
Mình sẽ cài Harbor Registry và sử dụng domain name là ***harbor.prod.viettq.com***. Ở đây mình sẽ dùng lại cert đã gen trước đây (đang sử dụng để thông số kỹ thuật SSL Terminate ở Haproxy) để không phải gen lại nữa.
Các bạn hoàn toàn có thể tham khảo những tạo cert ở đây: ***https://viblo.asia/p/k8s-phan-7-huong-dan-tao-tich-xanh-cho-ung-dung-tren-k8s-dung-openssl-djeZ1EP8ZWz***
## Tạo thư mục setup và thư mục chứa tài liệu
Mình tạo thư mục lưu những thông số kỹ thuật setup tại **/home/sysadmin/open-sources/harbor_registry** và tạo riêng thư mục lưu data của registry tại **/data/harbor_data**. Lưu ý mình sẽ dùng user root để cài.
bash
sudo -s
mkdir -p /data/harbor_data
mkdir -p /home/sysadmin/open-sources/harbor_registry
cd /home/sysadmin/open-sources/harbor_registry
curl -s https://api.github.com/repos/goharbor/harbor/releases/latest | grep browser_download_url | cut -d '"' -f 4 | grep '.tgz$' | wget -i -
tar xvzf harbor-offline-installer*.tgz
cd harbor
cp harbor.yml.tmpl harbor.yml
## Chuẩn bị certificate cho registry
Tạo thư mục chứa
Cert:
bash
mkdir -p /home/sysadmin/open-sources/harbor_registry/certs
cd /home/sysadmin/open-sources/harbor_registry/certs
vi harbor.prod.viettq.com.key
vi harbor.prod.viettq.com.crt
2 file *** .key** và ***.crt** phía trên mình lấy từ file tạo theo hướng dẫn ở phần 7 nhé! Link tham khảo: ***https://viblo.asia/p/k8s-phan-7-huong-dan-tao-tich-xanh-cho-ung-dung-tren-k8s-dung-openssl-djeZ1EP8ZWz***
Kết quả:
bash
[[email protected] certs]$ ls -lrt
total 8
-rw-rw-r-- 1 sysadmin sysadmin 1679 Apr 23 06:10 harbor.prod.viettq.com.key
-rw-rw-r-- 1 sysadmin sysadmin 1354 Apr 23 06:10 harbor.prod.viettq.com.crt
## Cấu hình file setup harbor.yaml
Vào lại thư mục setup để sửa file setup từ template của Harbor:
bash
cd /home/sysadmin/open-sources/harbor_registry
cd harbor
vi harbor.yaml
Các bạn cần update một số trong những tham số như sau:
yaml
hostname: harbor.prod.viettq.com
certificate: /home/sysadmin/open-sources/harbor_registry/certs/harbor.prod.viettq.com.crt
private_key: /home/sysadmin/open-sources/harbor_registry/certs/harbor.prod.viettq.com.key
harbor_admin_password: Harbor_123
password: root_123
data_volume: /data/harbor_data
Đảm bảo User root hoàn toàn có thể chạy dc lệnh docker-compose. Do mình cài docker-compose bằng user sysadmin nên user root không thấy được
docker-compose trong path của nó thì phải xử lý thêm như sau:
bash
[[email protected] harbor]$ sudo -s
[[email protected] harbor]# which docker-compose
/usr/bin/which: no docker-compose in (/sbin:/bin:/usr/sbin:/usr/bin)
[[email protected] harbor]# exit
[[email protected] harbor]$ which docker-compose
/usr/local/bin/docker-compose
[[email protected] harbor]$ sudo -s
[[email protected] harbor]# cp /usr/local/bin/docker-compose /usr/bin/
## Cài đặt harbor registry
Sau khi thông số kỹ thuật xong xuôi thì thực hiện setup bằng 1 lệnh:
bash
cd /home/sysadmin/open-sources/harbor_registry/harbor
./install.sh
Kết quả khi chạy thành công sẽ có những container như sau:
bash
[[email protected] harbor]# docker-compose ps
Name Command State Ports
------------------------------------------------------------------------------------------------------------------------------------------------
harbor-core /harbor/entrypoint.sh Up (healthy)
harbor-db /docker-entrypoint.sh 96 13 Up (healthy)
harbor-jobservice /harbor/entrypoint.sh Up (healthy)
harbor-log /bin/sh -c /usr/local/bin/ ... Up (healthy) 127.0.0.1:1514->10514/tcp
harbor-portal nginx -g daemon off; Up (healthy)
nginx nginx -g daemon off; Up (healthy) 0.0.0.0:80->8080/tcp,:::80->8080/tcp, 0.0.0.0:443->8443/tcp,:::443->8443/tcp
redis redis-server /etc/redis.conf Up (healthy)
registry /home/harbor/entrypoint.sh Up (healthy)
registryctl /home/harbor/start.sh Up (healthy)
## Kết nối Web-UI của harbor
Bạn khai host trên client như sau:
192.168.10.20 harbor.prod.viettq.com
Sau đó vào địa chỉ ***https://harbor.prod.viettq.com***. Sở dĩ mình khai host và link
theo domain là để sử dụng được thông số kỹ thuật SSL:
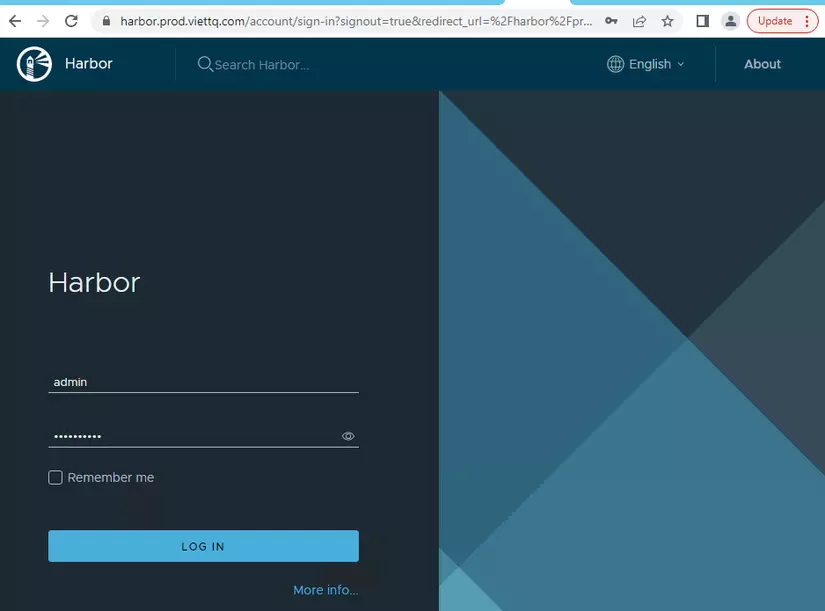
Các bạn đăng nhập bằng user admin, pass như đã set ở file thông số kỹ thuật phía trên.
### Cấu hình project và phân quyền user
Vào mục Users –> NEW USER rồi nhập thông tin để tạo user. Mình tạo user/pass là **demo/Demo_123**
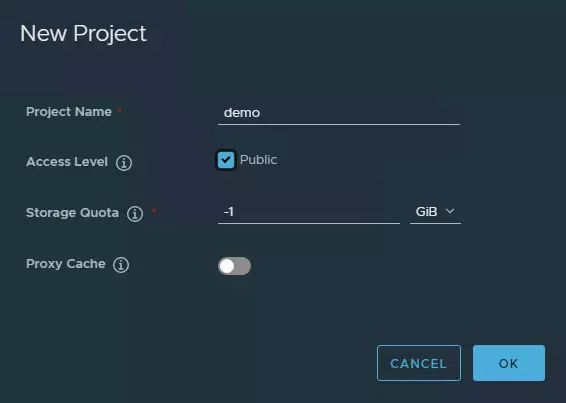
Vào Projects để tạo project và gán quyền cho user vừa tạo:
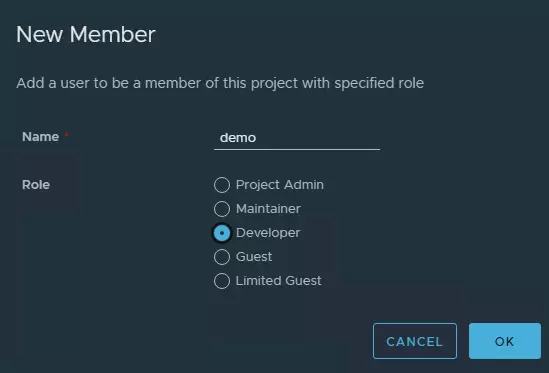
Gán quyền cho user **demo**vào project này: Vào project **demo**, chọn Members –> +USER:
## Cấu hình link cho client (để pull/push image)
Khai báo host cho client:
192.168.10.20 harbor.prod.viettq.com
Tạo thư mục chứa cert trên client:
bash
sudo -s
mkdir -p /etc/docker/certs.d/harbor.prod.viettq.com/
cd /etc/docker/certs.d/harbor.prod.viettq.com/
vi harbor.prod.viettq.com.crt
Trong số đó nội dung file **harbor.prod.viettq.com.crt** đó đó là file mình tạo để setup harbor như bước trên.
Tag image cho
registry này và push thử lên. Mình sẽ pull image **hello-world** từ github về tag và push lên Harbor Registry này:
[[email protected] harbor]$ docker pull hello-world
Using default tag: latest
latest: Pulling from library/hello-world
Digest: sha256:10d7d58d5ebd2a652f4d93fdd86da8f265f5318c6a73cc5b6a9798ff6d2b2e67
Status: Image is up to date for hello-world:latest
docker.io/library/hello-world:latest
[[email protected] harbor]$ docker tag hello-world:latest harbor.prod.viettq.com/demo/hello-world:latest
[[email protected] harbor]$ docker login harbor.prod.viettq.com
Username: demo
Password:
WARNING! Your password will be stored unencrypted in /home/sysadmin/.docker/config.json.
Configure a credential helper to remove this warning. See
https://docs.docker.com/engine/reference/commandline/login/#credentials-store
Login Succeeded
[[email protected] harbor]$ docker push harbor.prod.viettq.com/demo/hello-world:latest
The push refers to repository [harbor.prod.viettq.com/demo/hello-world]
e07ee1baac5f: Pushed
latest: digest: sha256:f54a58bc1aac5ea1a25d796ae155dc228b3f0e11d046ae276b39c4bf2f13d8c4 size: 525
***Như vậy là đã push được docker image lên harbor registry rồi. Lưu ý trước khi push thì những bạn phải thực hiện lệnh docker login và nhập thông tin user của harbor như tôi đã tạo trước đó nhé!***
# Hướng dẫn cài Private Docker Registry
Registry này setup đơn giản, gọn nhẹ. Và đi kèm với đó thì nó cũng luôn có thể có rất ít tính năng, không tương hỗ
phân quyền.. Nói chung nó làm đúng trách nhiệm quản lý Docker Image thôi, đủ để bạn hoàn toàn có thể dùng để pull/push image.
## Tạo thư mục setup
Yêu cầu là máy phải setup Docker và docker-compose. Tới phần này thì việc setup này là bắt buộc những bạn phải biết rồi nên mình không ra mắt thêm ở đây nữa.
Mình tạo thư mục lưu file setup và thư mục lưu data ở phân vùng /data là một phân vùng riêng để lưu tài liệu (trong môi trường tự nhiên thiên nhiên prod thì thường phân vùng lưu tài liệu sẽ ưu tiên chạy từ
SAN):
bash
mkdir -p /home/sysadmin/open-sources/private-docker-registry
mkdir -p /home/sysadmin/open-sources/private-docker-registry/certs
cd /home/sysadmin/open-sources/private-docker-registry
sudo mkdir /data/registry_data
sudo chown -r sysadmin:sysadmin /data/registry_data
## Tạo certificate cho Private Docker Registry
Các bạn hoàn toàn có thể tham khảo thêm và phần Certificate này ở nội dung bài viết trước của tớ ở đây: ***https://viblo.asia/p/k8s-phan-7-huong-dan-tao-tich-xanh-cho-ung-dung-tren-k8s-dung-openssl-djeZ1EP8ZWz***
Trong phần này tất cả chúng ta sẽ tạo một CA, sau đó sẽ tạo tiếp SSL Cert cho Registry được sign bởi CA đã tạo.
### Tạo Certificate Authority
Thực hiện lệnh sau để tạo Private Key cho CA, bạn nhập pass khi
được hỏi và nhớ pass này nhé:
bash
cd /home/sysadmin/open-sources/private-docker-registry/certs
openssl genrsa -des3 -out rootCA.key 2048
Enter pass phrase for rootCA.key:
Verifying - Enter pass phrase for rootCA.key:
Tạo file pem từ file private key (nhập pass của rootCA đã tạo phía trên):
bash
[[email protected]]# openssl req -x509 -new -nodes -key rootCA.key -sha256 -days 1825 -out rootCA.pem
Enter pass phrase for rootCA.key:
You are about to be asked to enter information that will be incorporated
into your certificate request.
What you are about to enter is what is called a Distinguished Name or a DN.
There are quite a few fields but you can leave some blank
For some fields there will be a default value,
If you enter '.', the field will be left blank.
-----
Country Name (2 letter code) [XX]:VN
State or Province Name (full name) []:HN
Locality Name (eg, city) [Default City]:HN
Organization Name (eg, company) [Default Company Ltd]:VietTQ_CA
Organizational Unit Name (eg, section) []:VietTQ_CA_Unit
Common Name (eg, your name or your server's hostname) []:private-docker-registry.viettq.com
E-Mail Address []:
Sau bước này bạn sẽ thấy có 2 file sinh ra:
bash
[[email protected] certs]$ ls -lrt
total 8
-rw-rw-r-- 1 sysadmin sysadmin 1751 Apr 23 03:36 rootCA.key
-rw-rw-r-- 1 sysadmin sysadmin 1460 Apr 23 03:39 rootCA.pem
### Tạo SSL Certificate cho Private Docker Registry
Đầu tiên ta tạo một file openssl.cnf để thông số kỹ thuật thêm thông tin SAN như sau
[req]
distinguished_name = req_distinguished_name
req_extensions = v3_req
[req_distinguished_name]
countryName = VN
countryName_default = VN
stateOrProvinceName = HN
stateOrProvinceName_default = HN
localityName = HN
localityName_default = HN
organizationalUnitName = VietTQ_DEVOPS
organizationalUnitName_default = VietTQ_DEVOPS
commonName = private-docker-registry.viettq.com
commonName_max = 64
[ v3_req ]
# Extensions to add to a certificate request
basicConstraints = CA:FALSE
keyUsage = nonRepudiation, digitalSignature, keyEncipherment
subjectAltName = @alt_names
[alt_names]
DNS.1 = *.viettq.com
Ở đây mình tạo SSL Certcificate cho domain của Registry là *.viettq.com. Tiếp theo là
tạo file key cho domain:
bash
sudo openssl genrsa -out private-docker-registry.key 2048
Sau đó ta tạo file Sigining Request từ file key và file config trên:
bash
sudo openssl req -new -out private-docker-registry.csr -key private-docker-registry.key -config openssl.cnf
Kết quả sinh ra file **private-docker-registry.csr**. File CSR này còn có ý nghĩa như tờ đơn xin được phê duyệt một chiếc chứng từ rằng tôi là domain **private-docker-registry.viettq.com**. Người phê duyệt thì là CA (Certificate Authority) để tạo ra file ghi nhận có đuôi .crt.
[[email protected] certs]$ sudo openssl x509 -req -days 3650 -in private-docker-registry.csr -CA rootCA.pem -CAkey rootCA.key -CAcreateserial -out private-docker-registry.crt -extensions v3_req -extfile openssl.cnf
Signature ok
subject=/C=VN/ST=HN/L=HN/OU=VietTQ_DEVOPS/CN=private-docker-registry.viettq.com
Getting CA Private Key
Enter pass phrase for rootCA.key:
[[email protected] certs]$ ls -lrt
total 28
-rw-rw-r-- 1 sysadmin sysadmin 1751 Apr 23 03:36 rootCA.key
-rw-rw-r-- 1 sysadmin sysadmin 1460 Apr 23 03:39 rootCA.pem
-rw-r--r-- 1 root root 1675 Apr 23 03:49 private-docker-registry.key
-rw-rw-r-- 1 sysadmin sysadmin 581 Apr 23 03:52 openssl.cnf
-rw-r--r-- 1 root root 1098 Apr 23 03:52 private-docker-registry.csr
-rw-r--r-- 1 root root 17 Apr 23 03:57 rootCA.srl
-rw-r--r-- 1 root root 1359 Apr 23 03:57 private-docker-registry.crt
Kết quả ta đã có được 2 file cần
thiết để cài là **private-docker-registry.key** và **private-docker-registry.crt**
### Cài đặt Private Docker Registry bằng docker-compose
Tạo file docker-compose.yaml có nội dung như sau:
yaml
version: '3'
services:
docker-registry:
image: registry:2
container_name: private-docker-registry
ports:
- 5000:5000
restart: always
environment:
REGISTRY_STORAGE_FILESYSTEM_ROOTDIRECTORY: /data
REGISTRY_HTTP_TLS_CERTIFICATE: /certs/private-docker-registry.crt
REGISTRY_HTTP_TLS_KEY: /certs/private-docker-registry.key
REGISTRY_STORAGE_CACHE_BLOBDESCRIPTOR: redis
REGISTRY_REDIS_ADDR: redis-registry:6379
volumes:
- /data/registry_data:/data
- /home/sysadmin/open-sources/private-docker-registry/certs:/certs
links:
- redis-registry
docker-registry-ui:
image: konradkleine/docker-registry-frontend:v2
container_name: docker-registry-ui
restart: always
ports:
- 8088:80
environment:
ENV_DOCKER_REGISTRY_USE_SSL: 1
ENV_DOCKER_REGISTRY_HOST: private-docker-registry
ENV_DOCKER_REGISTRY_PORT: 5000
redis-registry:
image: redis:latest
container_name: redis-registry
restart: always
ports:
- 6379:6379
Tiếp theo là cài lên bằng lệnh docker-compose:
bash
[[email protected] private-docker-registry]$ docker-compose up -d
Creating network "private-docker-registry_default" with the default driver
Creating docker-registry-ui ... done
Creating redis-registry ... done
Creating private-docker-registry ... done
[[email protected] private-docker-registry]$ docker ps
CONTAINER ID IMAGE COMMAND CREATED STATUS PORTS NAMES
71987c2855e5 registry:2 "/entrypoint.sh /e..." 3 seconds ago Up 3 seconds 0.0.0.0:5000->5000/tcp private-docker-registry
f3899ed5d349 docker.io/redis:latest "docker-entrypoint..." 4 seconds ago Up 3 seconds 0.0.0.0:6379->6379/tcp redis-registry
7ab9c04381fa konradkleine/docker-registry-frontend:v2 "/bin/sh -c $START..." 4 seconds ago Up 3 seconds 443/tcp, 0.0.0.0:8088->80/tcp docker-registry-ui
### Cấu hình cho client
Với những node client để hoàn toàn có thể pull/pull được image từ registry này thì ta cần thêm bước khai báo như sau:
bash
sudo -s
mkdir -p /etc/docker/certs.d/private-docker-registry.viettq.com:5000
cd /etc/docker/certs.d/private-docker-registry.viettq.com:5000/
vi ca.crt
Các bạn cần điền nội
dung file ca.crt bằng file **private-docker-registry.crt** đã tạo trước đó.
Tiếp theo là khai báo file host cho client:
192.168.10.20 private-docker-registry.viettq.com
Trong số đó 192.168.10.20 là IP của node cài Private Docker Registry.
Bây giờ hoàn toàn có thể tag thử image và push lên registry xem sao:
bash
[[email protected] private-docker-registry]$ docker tag hello-world:latest private-docker-registry.viettq.com:5000/demo/hello-world:latest
[[email protected] private-docker-registry]$ docker push private-docker-registry.viettq.com:5000/demo/hello-world:latest
The push refers to a repository [private-docker-registry.viettq.com:5000/demo/hello-world]
e07ee1baac5f: Pushed
latest: digest: sha256:f54a58bc1aac5ea1a25d796ae155dc228b3f0e11d046ae276b39c4bf2f13d8c4 size: 525
Như vậy là client đã hoàn toàn có thể push được image lên registry rồi.
### Xem thông tin registry trên Web-UI
Bạn cũng khai báo host cho client để vào web-io bằng domain name.
192.168.10.20 private-docker-registry.viettq.com
Sau đó vào trình duyệt link vào theo địa chỉ: ***private-docker-registry.viettq.com:8088***
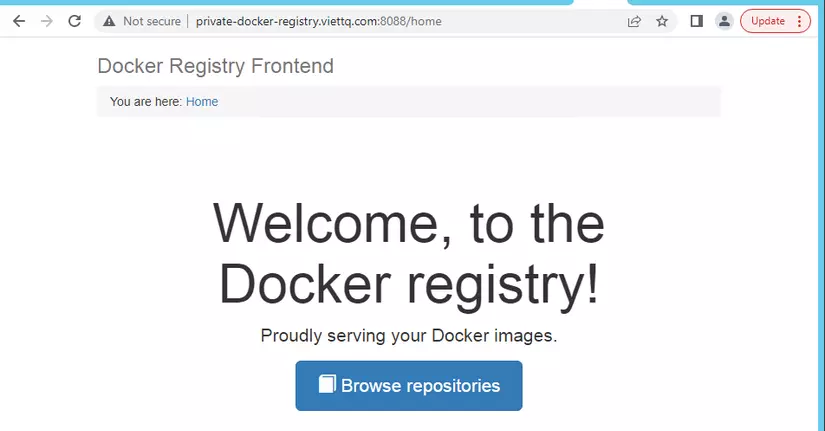
Vào bên trong repositories để xem image mình push lên:
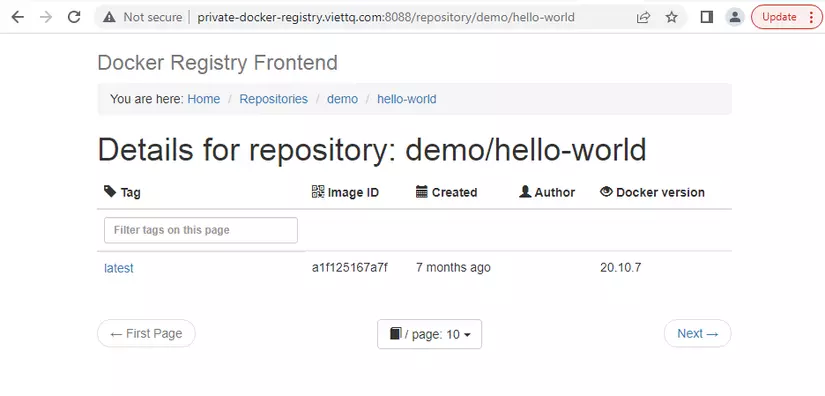
***Cảm ơn mọi người đã theo dõi và hẹn hội ngộ ở những phần tiếp theo!***
Nguồn nội dung bài viết : Viblo
Tải thêm tài liệu liên quan đến nội dung bài viết Tại sao cần private registry Harbor registry Docker registry URL Docker registry SSL
Post a Comment